

Automation Guide
Web automation can be utilized from different angles. The most common angle: programming repetitive human workflows on graphical user interfaces (GUIs). This has been popular with testing the progressively rendered user interface of web applications. However, it can also be used to shortcut certain actions for human users. This kind of web automation solely works with actuation capabilities.
Lets utilize the Webfuse Automation API to create an automatated sign in flow to the Webfuse Studio application.
1. Create Webfuse Space
Section titled “1. Create Webfuse Space”First, we need a dedicated Webfuse Space for the automation realm. Follow the Space & Session Guide to create and configure a Solo Space. In the Session Editor, put the Webfuse Studio Sign In page URL (https://webfuse.com/studio/auth/login) as a Start Page.
2. Create Webfuse Extension
Section titled “2. Create Webfuse Extension”To automate the Webfuse Sign Up page, we need to install a Webfuse Extension to the Webfuse Space of which a Session runs the automation. The Extension will consist of only a manifest metadata file, and a content script. The content script will concern with the specific automation.
Directoryagent-extension
- manifest.json Extension metadata.
- content.js Automation module injected into the underlying page.
{ "manifest_version": 3, "version": "1.0", "name": "Webfuse Sign In Automation", "content_scripts": [ { "js": ["content.js"], "matches": ["webfuse.com/studio/auth/login"] // where to automate } ]}3. Define Content Automation Instructions
Section titled “3. Define Content Automation Instructions”In the content script, we simply define all the automation steps in a sequential fashion. We target every element by unique CSS selector. This works no different than with document.querySelector(). In fact, it is even more powerful given the cross-frame and -shadow targeting capabilties of the Webfuse Automation API.
content.js
document.addEventListener("DOMContentLoaded" () => {
// 1. Fill in email field await browser.webfuseSession .automation .act .type('#email', DATA.email, { overwrite: true, timePerChar: 150, // Average to 150ms per typed char (human-like input) mouseMove: true // show a virtual mouse pointer });
// 2. Fill in password field await browser.webfuseSession .automation .act .type('#password', DATA.password, { timePerChar: 0, // Instant typing ('paste') mouseMove: true });
// 3. Click submit button await browser.webfuseSession .automation .act .click('button[data-t="login-form-submit"]');
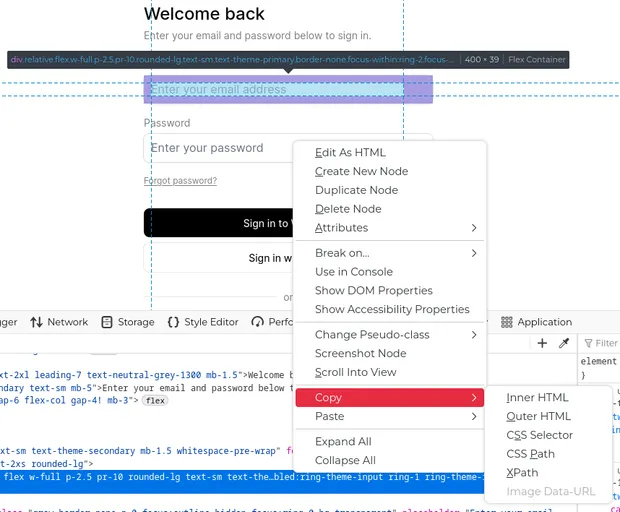
});Unique CSS selectors for every element in a web page can be looked up via a web inspector that is part of every major web browser.
4. Working with Individual Automation Data
Section titled “4. Working with Individual Automation Data”For the present case, we chose to hardcode the user data in an object called DATA:
content.js
const DATA = { email: "john.doe@example.org", password: "12345"};In a more elaborate setup, this data could be retrieved individually for a specific user, e.g., from local storage.
Whenever we open a Session of our Space, our automation will trigger as follows:
- Open the Webfuse Studio Sign In page,
- fill in our information,
- hit the submit button,
- wait for the Tab to be navigated to the Studio homepage.